


In the age of easily applied photo filters, pictures with effects applied are common enough. But how often do you see pictures that are artistically enhanced by hand instead of by technology? Follow these steps and create your own tangible photo filters. It’s fun, easy, and will entertain you for hours. I took my new camera toys to Montana to experiment and spice up my travel shots. Get creative. You can make a filter out of just about anything. Challenge yourself!
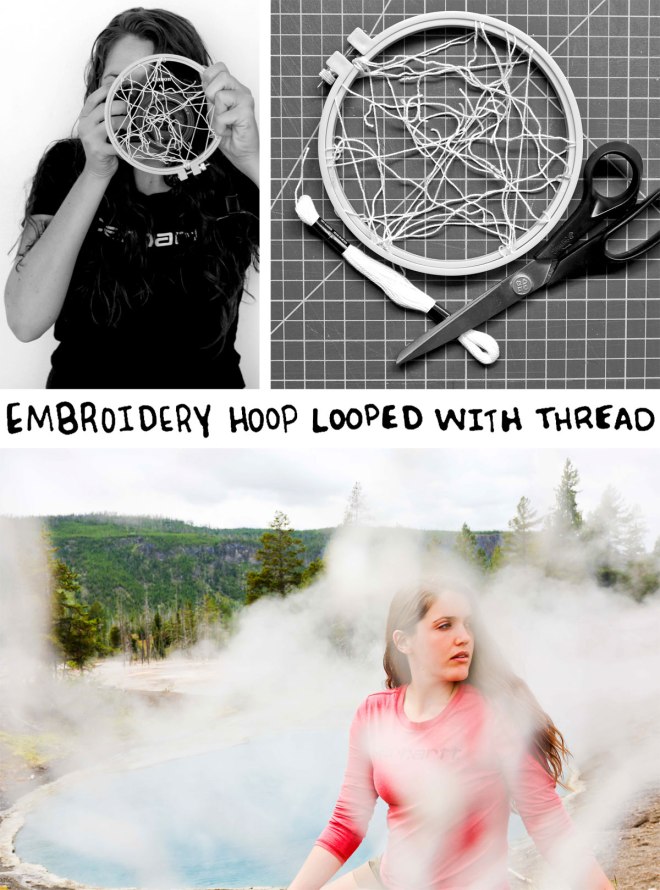
1.) Wrap an embroidery hoop with thread. This will create a soft maze of blurry lines across the photographs.
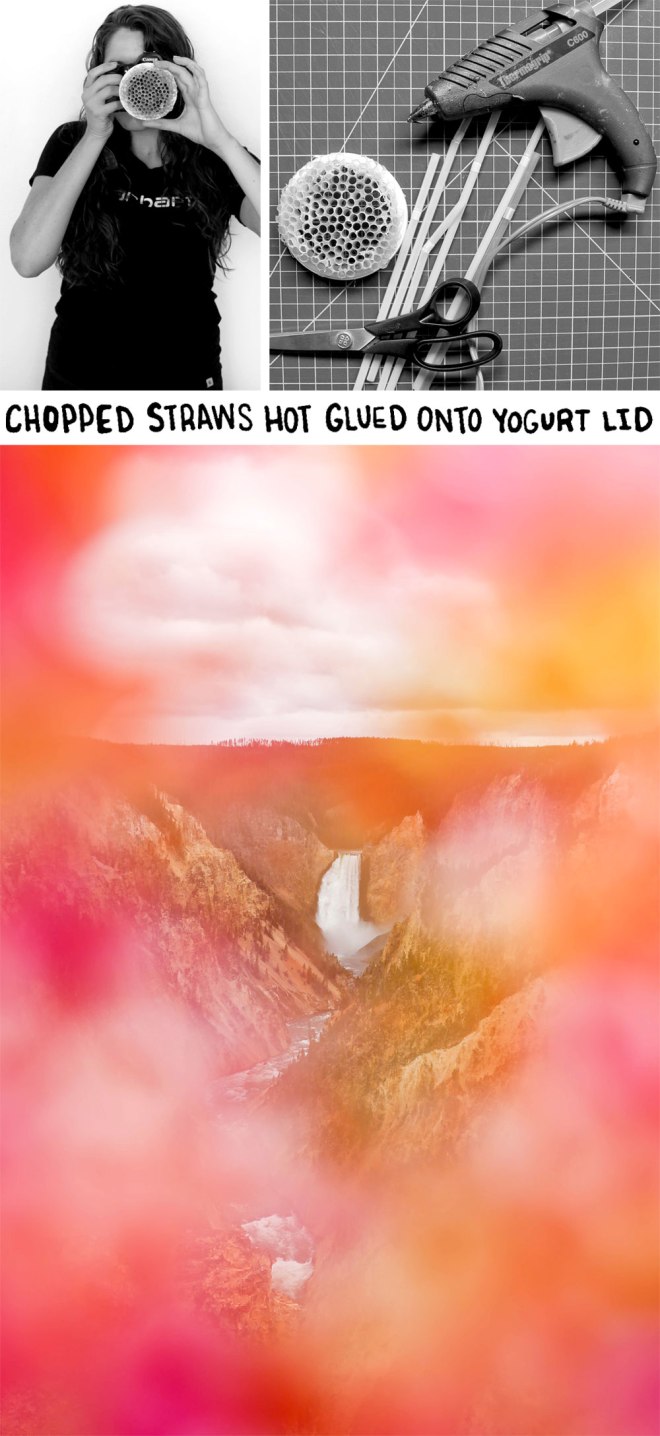
2.) Cut straws into small sections, each a few centimeters long. Then cut a hole the same size as your camera lens into a yogurt lid. Glue the straw bits together so that the holes of the straws are on the top and bottom of the bundle. Adhere it to the lid. This creates an beautifully obstructed view of your subject, hazy from the straws. Whatever color the straws are will effect the mood of the photo, so pick accordingly.
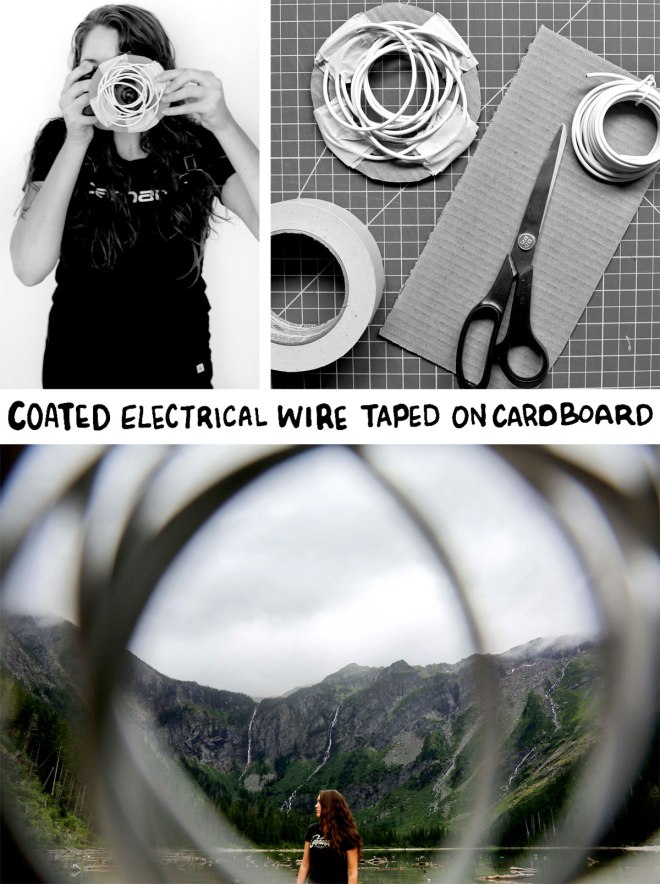
3.) Coil up coated electrical wire. Cut a hole the same size as your camera lens into a circle of cardboard. Tape the coil to the cardboard. This creates a cool looped vignette.
4.) Cut a small slit into the bottom of a ziploc bag. Use a rubber band to attach the bag to the lens. When using this filter, make sure the edges of the frame are covered by the plastic to create a fuzzy effect.
5.) Sandwich glitter between two pieces of saran wrap. Squirt hot glue into a small circle in the center to created a seal. Cut a hole in the yogurt lid the size of your camera lens. Glue the glitter filled saran wrap to the lid. This will create a colorful shimmery look on the edge of pictures.
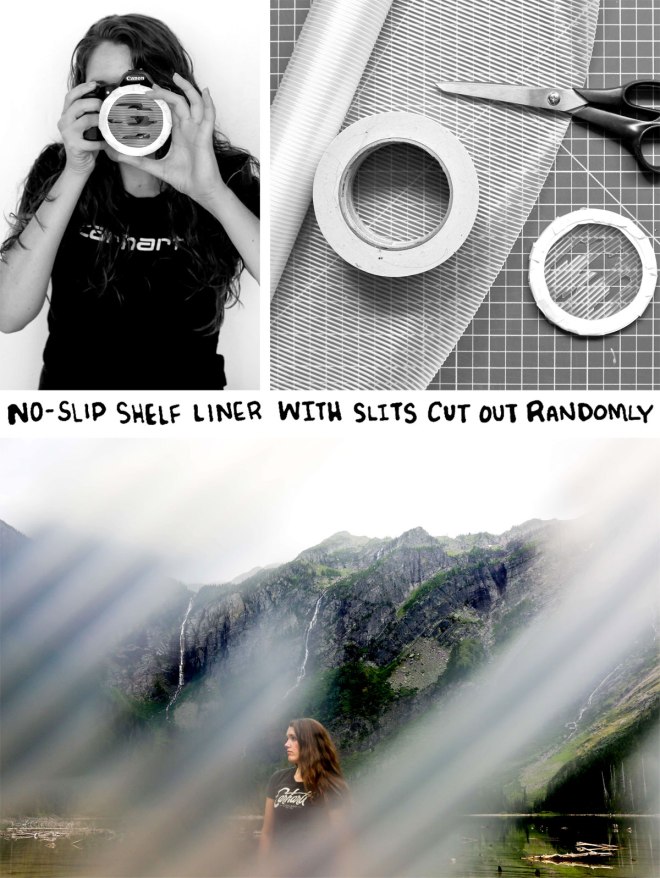
6.) Prepare another yogurt lid. Cut a circle of no-slip shelf liners and glue it to the lid. Slice a few random slits into the liner. This makes linear shapes sweep across the frame, only showing sections of the subject.
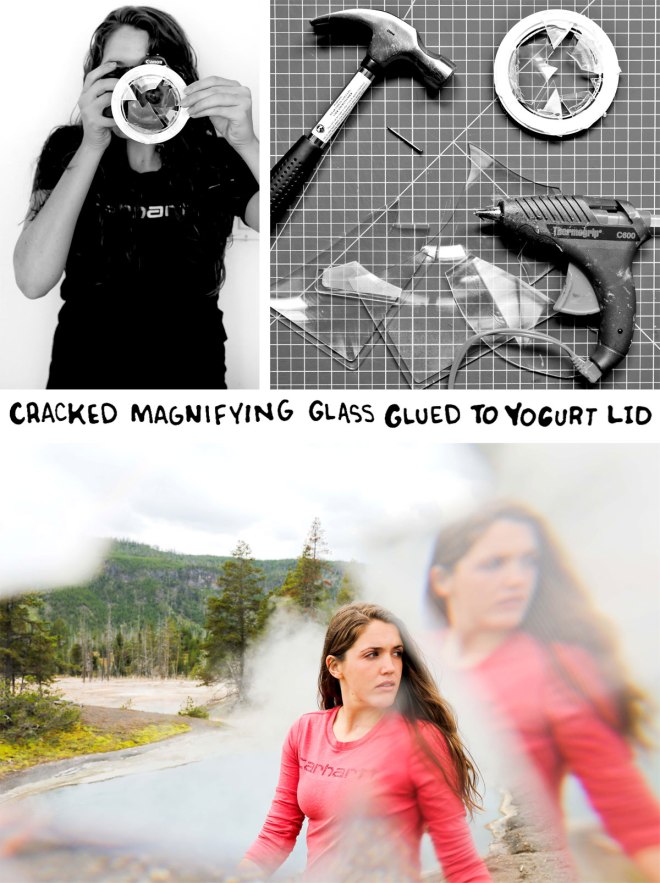
7.) Shatter a piece of magnifying glass. Use a prepared yogurt lid for your lens. Glue the angular pieces of the magnifying glass to the rim of the lid. This creates a bit of distortion around the edges of the lens.
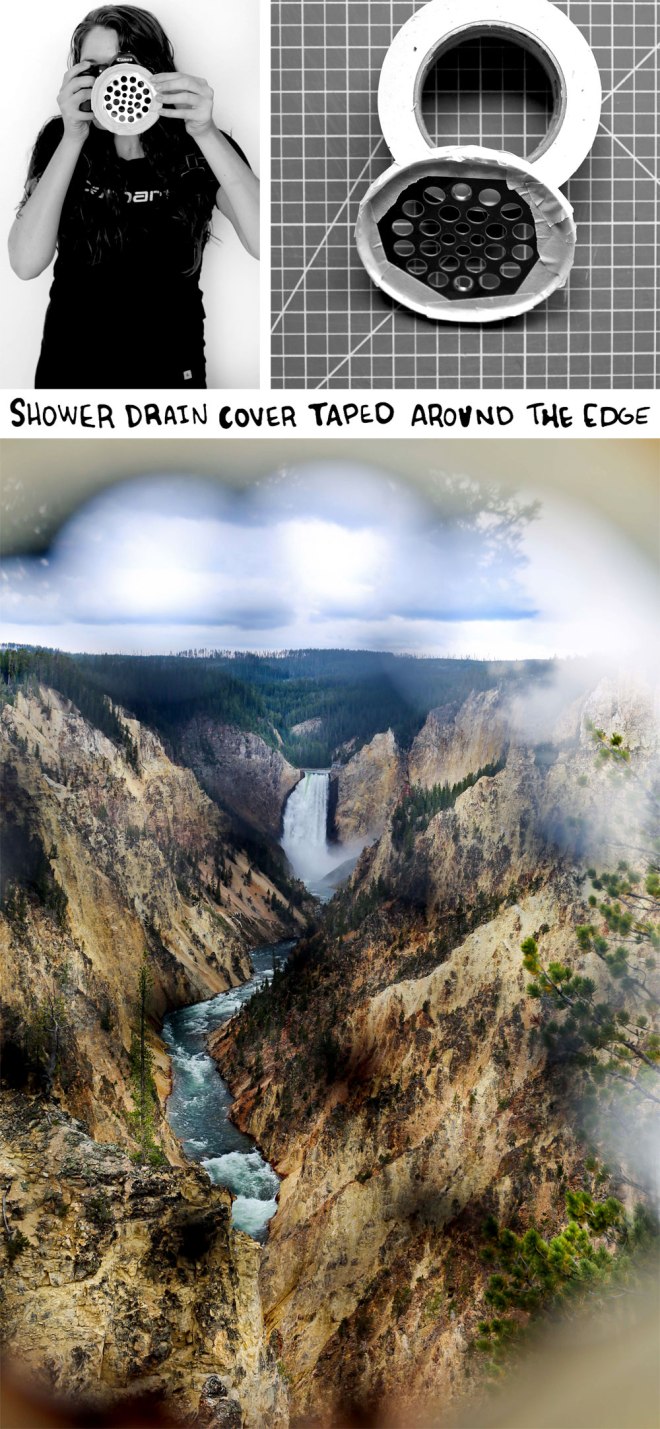
8.) Get the cover to a shower drain. Tape the edges so that it doesn’t cut your hands or hurt your camera. The holes allow light and an obstructed view to interplay.
9.) This filter is much like filter number 5, instead with beads. Sandwich tiny beads between two pieces of contact paper. Create a circle of hot glue in the center to form a seal. Glue the contact paper to a yogurt lid with a lens sized hole.
The Carhartt Legacy Tool Pouches are ideal for storing photo filters.
